Tel: 86-21-64306513 | E-mail: sales@aoetech.com
-
 English
-
 简体中文
简体中文
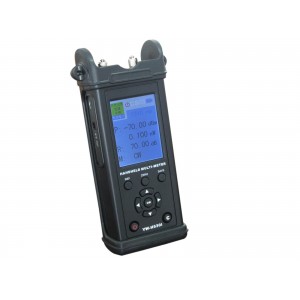
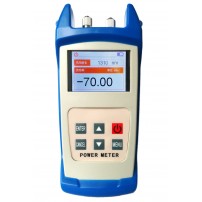
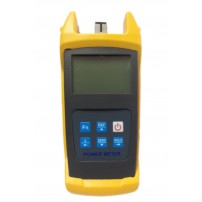
智能光型万用表
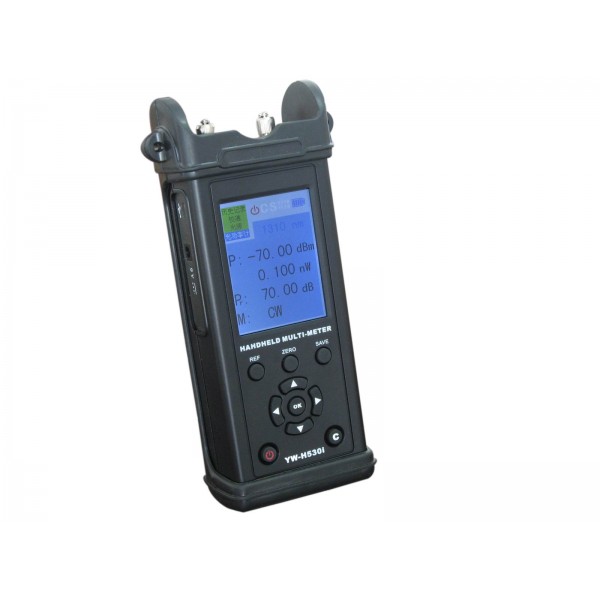
智能光型万用表
Intelligent Optical Multi-Meter
1.Genteal
Optical Multi-Meter integrates functions of both Intelligent Optical Power Meter and Intelligent Optical Light Source,the frequency of optical light source can set,and optical light source and optical power meter can be switched by menu directly,perfect combination to make your fiber measurement more convenient.
2.Specification
|
|
Parameter |
Specification |
|
Optical Power Meter Module |
Wavelength Range(nm) |
800~1700 |
|
Measurement Range(dBm) |
-70~+10 or -50~+30 |
|
|
Resolution(dBm) |
0.01 |
|
|
Uncertainty(dB) |
±5% |
|
|
Identified Frequency Range |
10Hz~60KHz |
|
|
Optical Laser Source Module |
Emitter |
F-P LD |
|
Operating wavelength(nm) |
1310/1550(optional) |
|
|
Output Power (dBm) |
-7 |
|
|
Output frequency |
270Hz,1KHz,2KHz |
|
|
General Specification |
Power Supply |
4 AA 1.5 alkaline battery AC adapter 9V |
|
Auto-off time |
10mins(Optional) |
|
|
Communication port |
USB |
|
|
Operating Temperature(℃) |
-10~+60 |
|
|
Dimension(mm) |
180*80*48 |
3.Components
- Intelligent Optical Multi-Meter----------------------------------------------1pcs
- User Manual--------------------------------------------------------------------1book
- USB data wire------------------------------------------------------------------------1pcs
- CD---------------------------------------------------------------------------------------1pcs
- Power Adapter------------------------------------------------------------------------1pcs
- Protect Jacket-------------------------------------------------------------------------1pcs
- 1.5V AA battery-----------------------------------------------------------------------4pcs
- Cleaning Cotton Swab--------------------------------------------------------------1bag
4.Function Directions
4.1 keyboard introduction
|
Sign |
Functions |
|
REF |
Relative measurement mode |
|
ZERO |
Clean dark current |
|
SAVE |
Save the current test data |
|
Power on/off or auto-off function |
|
|
C |
Exit without saving the current operation |
|
OK |
Confirm Key |
|
add operation to change values and change the wavelength calibration values / menus Up Operation |
|
|
reduction operation to change values and change the wavelength calibration values / menus Down operation |
|
|
Set the figures when changing the wavelength and calibration, shift to the right |
|
|
Set the figures when changing the wavelength and calibration, shift to the left |
4.2 Display Instroduction
The LCD screen displays the measured optical power in dBm and mW, uW, or nW; any wavelength at the range of 850 ~ 1650nm can be set; optical signal modulation frequency, battery capacity indicator, and automatic switch off status, etc.
5.Usage Direction
5.1 Power ON/OFF
1. Press key on panel board to switch on the unit.
2. press and hold key for three seconds to switch off the unit.
5.2 optical Laser Source Module
1. Switch on the unit.
2. Press key to choose laser source module on the left top of LCD,press”Ok”key to confirm.
3. Choose operating wavelength and mode of operating as per the display of LCD.
5.3 Absolute optical power measurement
1. Switch on optical multi-meter.
2. Set the operating wavelength,press key to choose the “optical power meter module” on the left top of unit,press”OK”key to confirm.
3. Press up down left right key to set the wavelength,press”OK”key to confirm.
4. Access to the measured light,the LCD displays the current measured values,including absolute power of linear and nonlinear values,if the measured light is modulated signals,and it shows the modulation frequency of measured signal.
5.4 Relative optical power measurement
1. Set the measuring wavelength.
2. In the absolute optical power measurement mode, measure the current power value by access to measured light.
3. Press“REF”key,the current value of optical power as the current reference value(in dBm as the unit),this time displays the current absolute power value and relative power value of 0dB.
4. Access to another measuring light,displays the current absolute power value and relative power value.
5.5 Save the measurement value
Access to the measured signal,press“SAVE”to save the current test data.
5.6 Check saved test data
Press key to choose“history memory” module on the top left of scree,press“OK”button to check the saved test data.
5.7 User self-calibration
1. Press key to choose ”calibration” module on the top left of screen, press”OK”button to confirm.
2. Press up、down、left、right key to set wavelength, press“OK”button to confirm.
- 智能光型万用表
智能光型万用表
Other products in the same category:
Copyright 2016 尖丰科技(香港)有限公司All Rights Reserved.
Tel: 86-21-64306513 E-mail: sales@aoetech.com